
This is a stunningly simple cake and can be adapted to suit your own selection of cutters and kitchen implements! The snowflakes are made from modelling paste instead of a regular sugarpaste as it dries harder much more quickly and can be rolled extremely thinly.
You will need:
1 x 8” cake, marzipanned and covered with white sugarpaste
White modelling paste or Sugar Florists Paste
Both Sainsburys and Tesco sell their own brand modelling paste which can be picked up easily and fairly cheaply. If you have a specialist stockists near to you then Squires Kitchen Sugar Florists Paste is a great option.
A selection of cutters to use as snowflakes
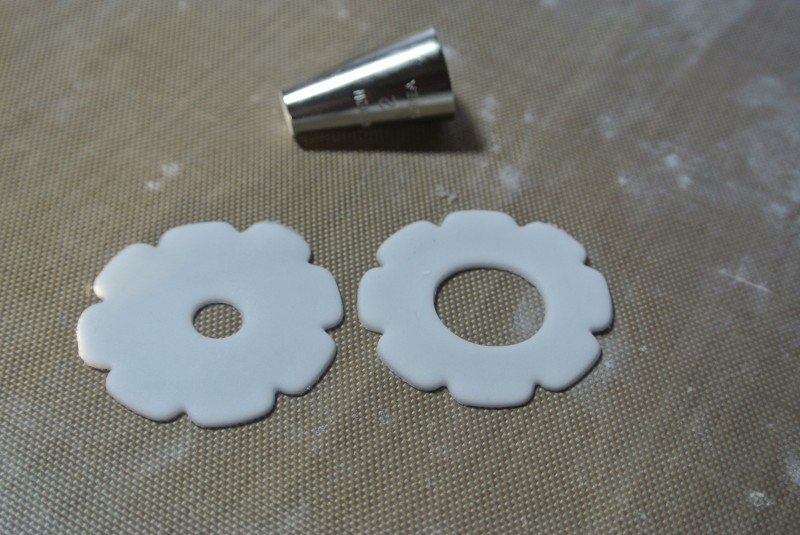
Look through your cookie and cake decorating cutters for anything relatively snowflake like – often flowers, calyx and star cutters will work a treat as well as any snowflake cutters you may have.
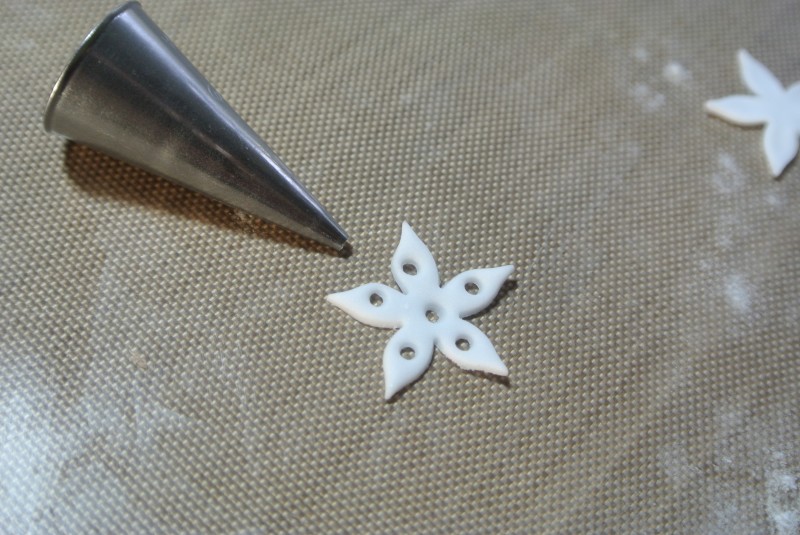
A selection of cutters to create the small holes in the snowflakes
You can get really ingenious here – the obvious choices are small circle, heart and rose petal cutters but you can also use the different sized round openings of piping nozzles – both ends! (no.s 2,3,4, small cupcake piping nozzles etc.)
A little snowflake lustre dust.
A little royal icing.
Work on your snowflakes first, roll out the modelling paste a little at a time. If the brand you are using is sticky then dust the work surface with a little icing sugar. If the paste you are using is a normal consistency then it’s best done with just a light smear of white vegetable fat instead.
Roll the paste out thinly and let it start to dry out slightly – about 3-4 minutes. Cut out a selection of snowflakes using a variety of different cutters but leave them on your work board for now. Gather up the excess scraps of paste and store out of the way.
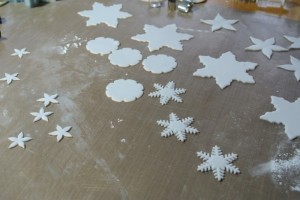
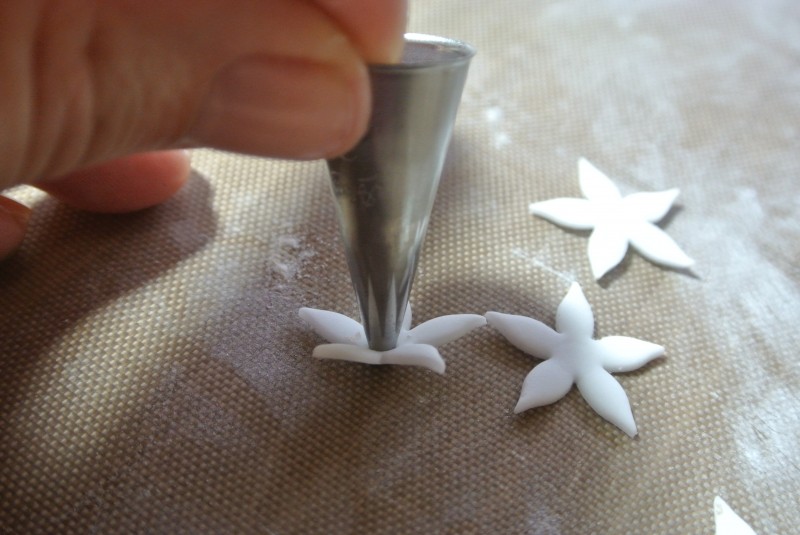
Now you need to punch out the design on each snowflake – again use a variety of your different small cutters – petal shapes, circles of different sizes etc.
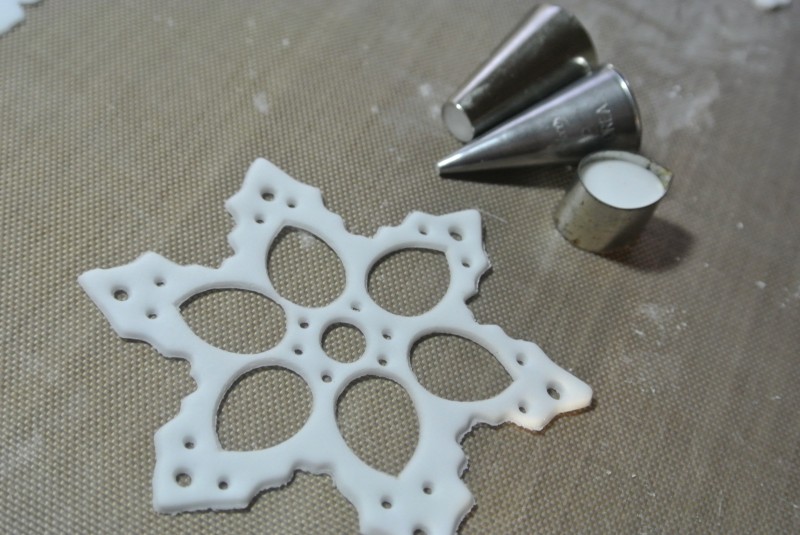
Make plenty of snowflakes in lots of different sizes until you will have plenty to work with.
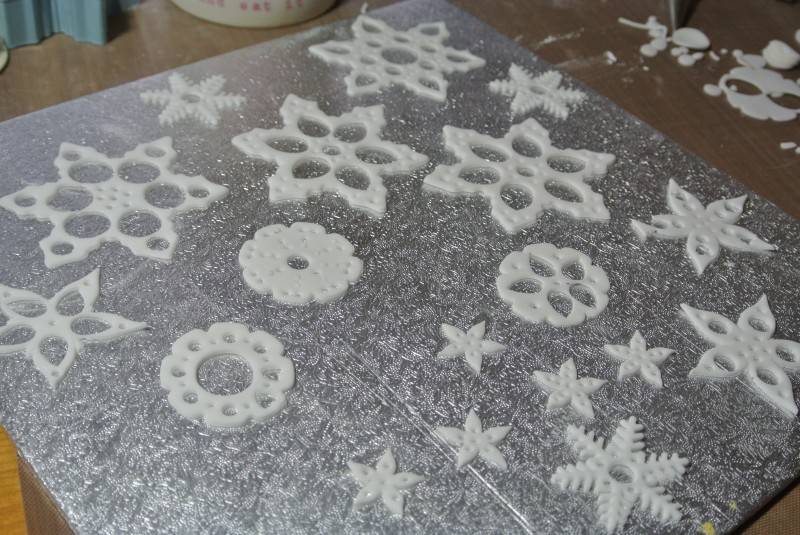
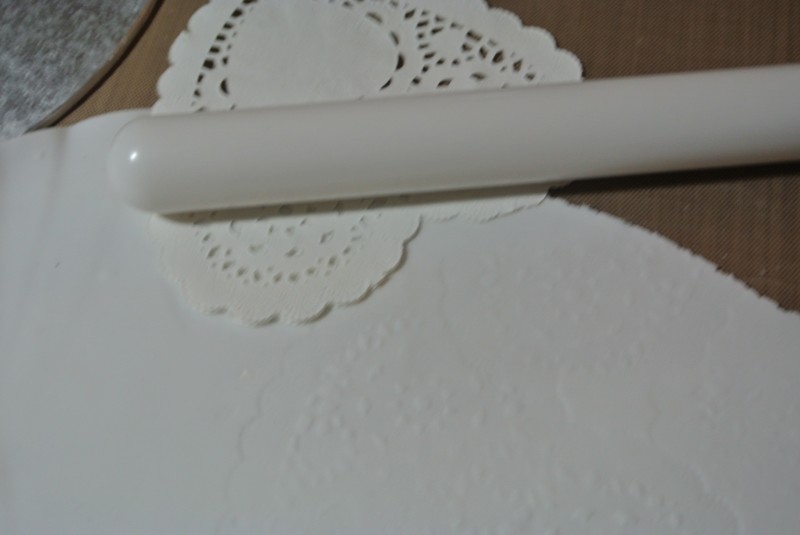
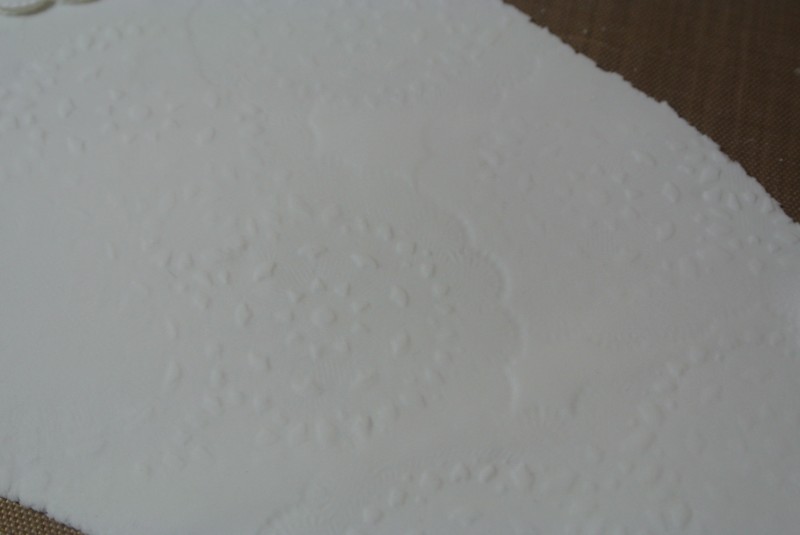
You can create some texture on the snowflakes by impressing the rolled out piece of modelling paste with something with an interesting texture – I used a doily – placed it in position and then rolled the rolling pin over it before cutting out the snowflakes as before.
Place the snowflakes onto a spare cake card or working board and allow them to dry out – at least overnight or longer if needed, just until they are fully dried through.
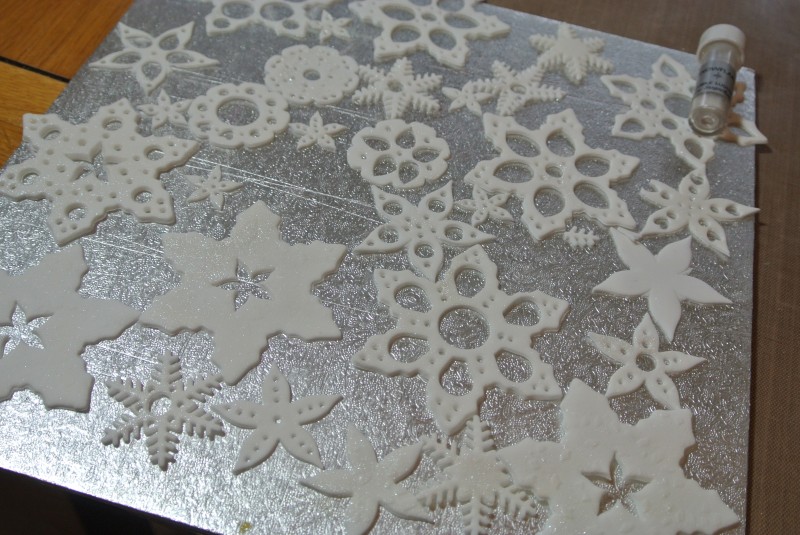
Brush each of the snowflakes with the pearlescent lustre dust using a soft paintbrush.
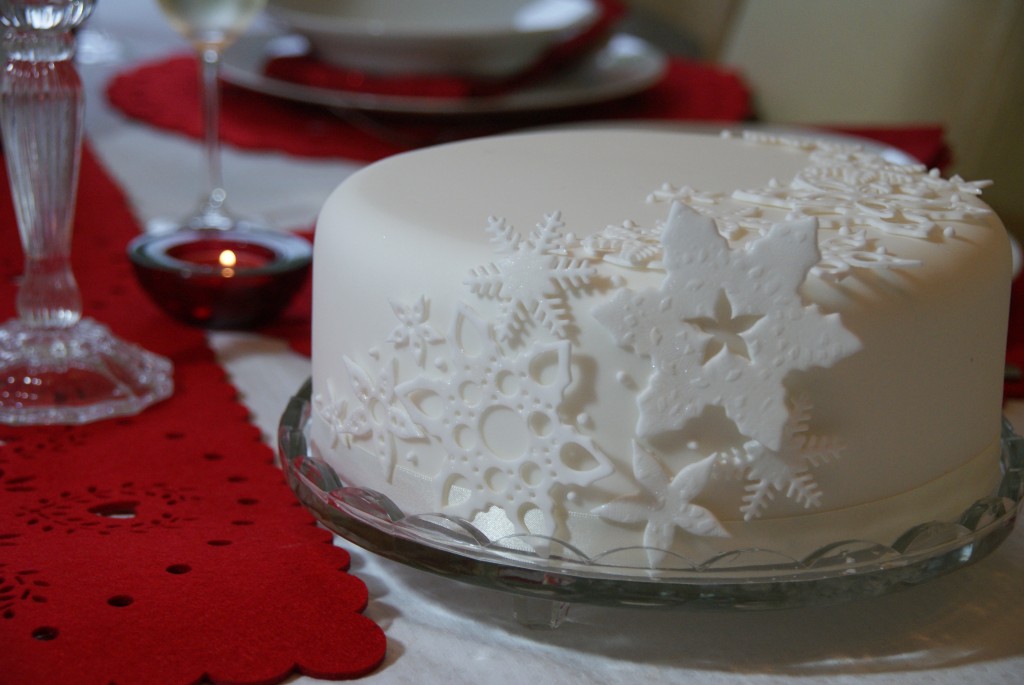
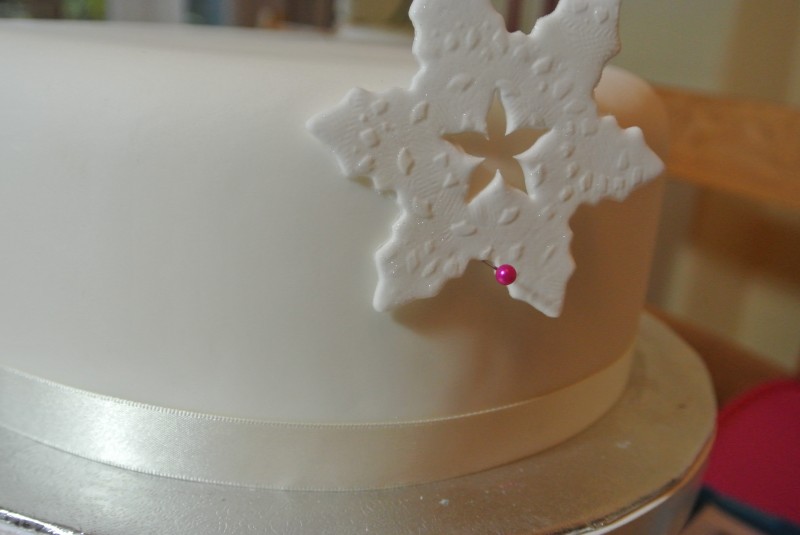
Trim the base of the cake with a white ribbon and secure at the back with a pearl headed pin.
Apply small dots of royal icing to the back of your snowflakes one at a time and secure them into position on the cake. Most of the smaller snowflakes will stick on straight away. For the larger ones that need a little bit more support use a cleverly positioned pin – through one of the cut outs into the cake to support it properly until the royal icing dries.
Work across and up the front of the cake first and then decorate the top using a variety of your snowflakes. Try layering the snowflakes on top of each other if you need to.
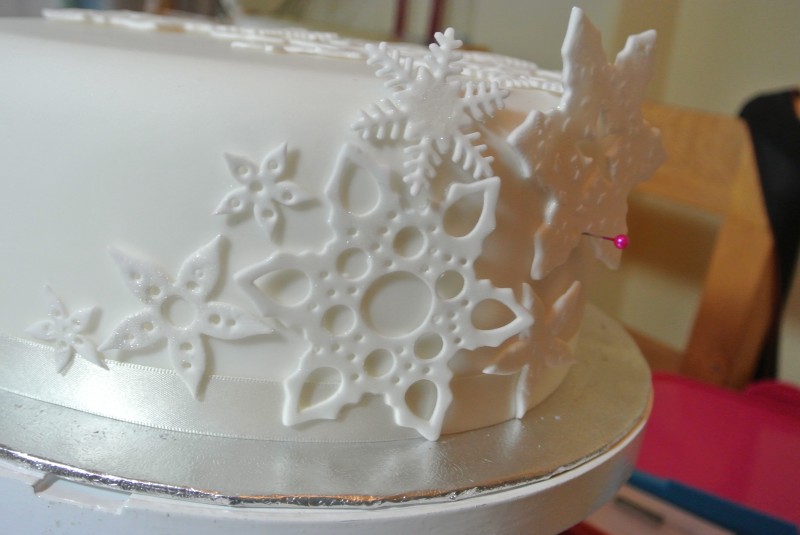
Finally add some dots of royal icing between the snowflakes to finish.

Beautiful!

Ruth Clemens, Baker Extraordinaire


6 Responses to Ice White Snowflakes Cake