 " width="477" height="261" border="0">
Just recently I’ve been using glaze icing to decorate and flood biscuits instead of the usual royal icing, not only do I find it a million times easier to work with, it gives you great results and tastes fab too!
I know I’m going to be working on a fair few projects in the coming months using this glaze so here’s the recipe.
Ingredients:
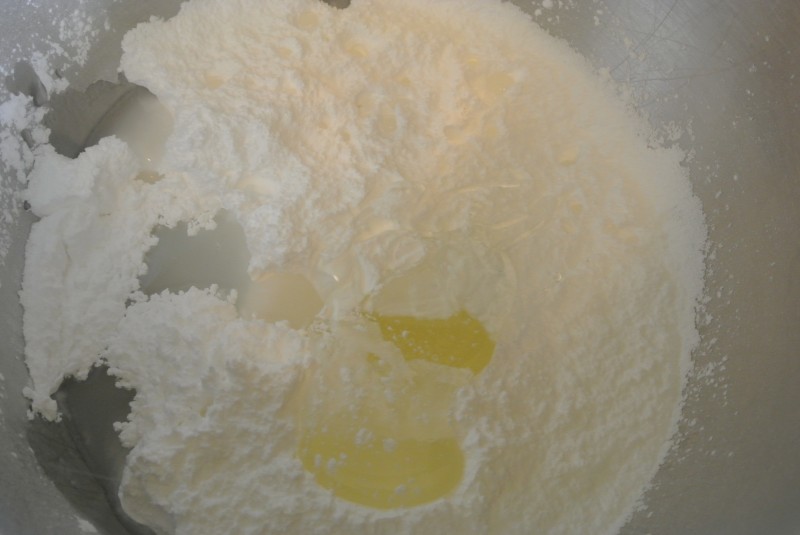
500g icing sugar
85g liquid glucose (available in tubes from the baking aisle in most large supermarkets)
60ml water
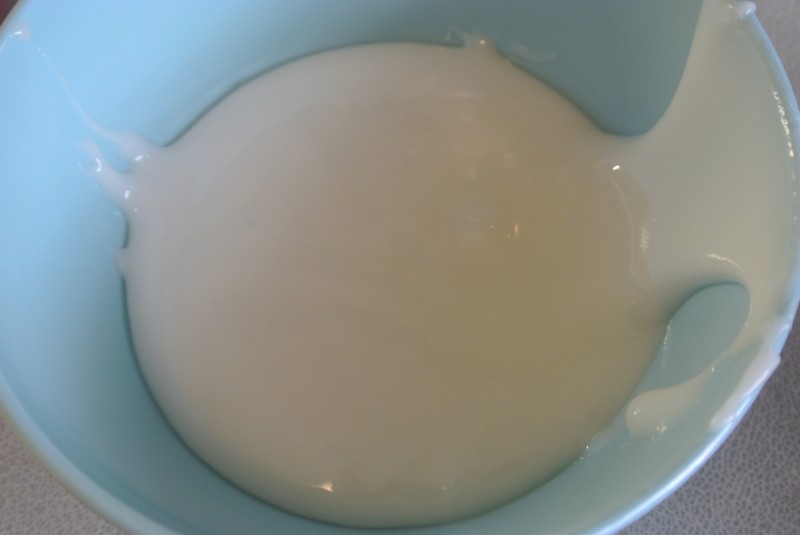
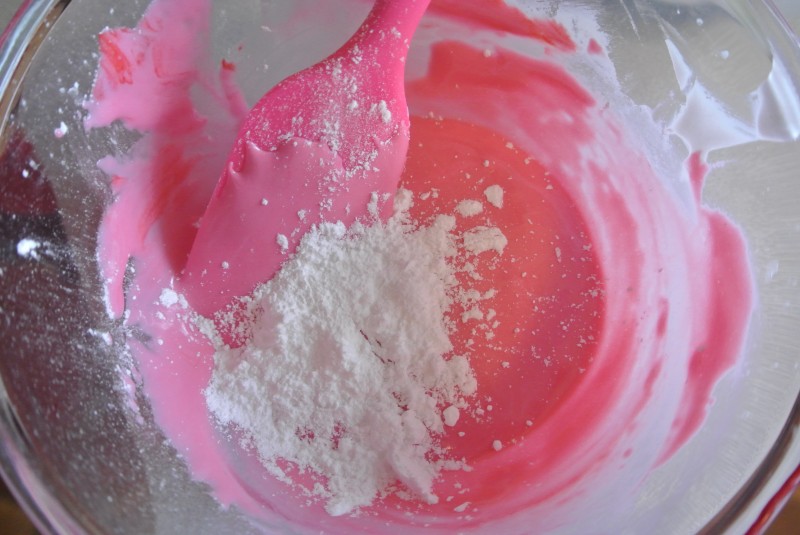
Place all the ingredients in a large bowl and mix together well until the consistency is even and there are no flecks or pockets of icing sugar left.
You can flavour this icing with any extracts as long as you are colouring the icing. If you’re wanting white then you need to stick to clear extracts for now (more on that later!)

These by Nielsen-Massey are great, you just need to add 1/2 to 1 teaspoon, just to taste.
For really zingy, almost fizzy icing dissolve 1/2 tsp of citric acid (available from the Chemists) in 50ml of warm water and use that to mix up the glaze icing.
Icing made it’s time to colour!
Use little portions in a small bowl and add small amounts of gel paste colourings in your chosen colour and mix well until even.
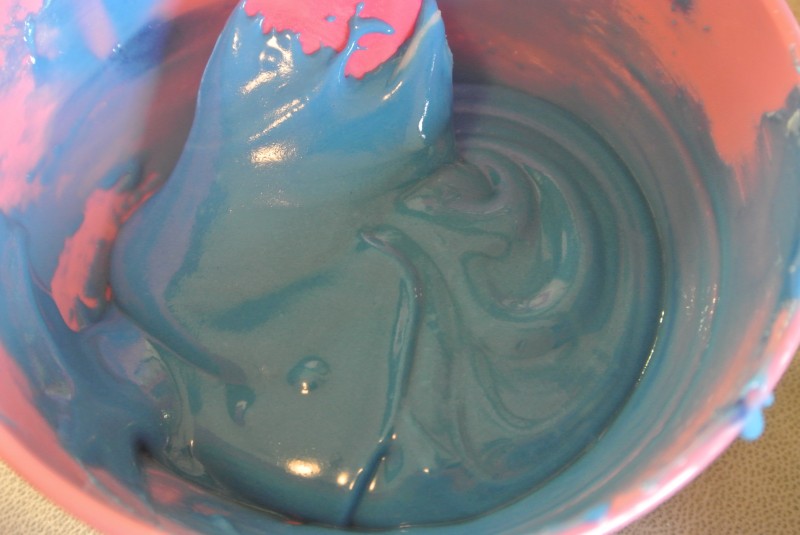
Once you have the correct colour we need to work on the consistency.
Lift up some glaze on your spoon and let it fall back into the bowl in a ribbon, start counting.
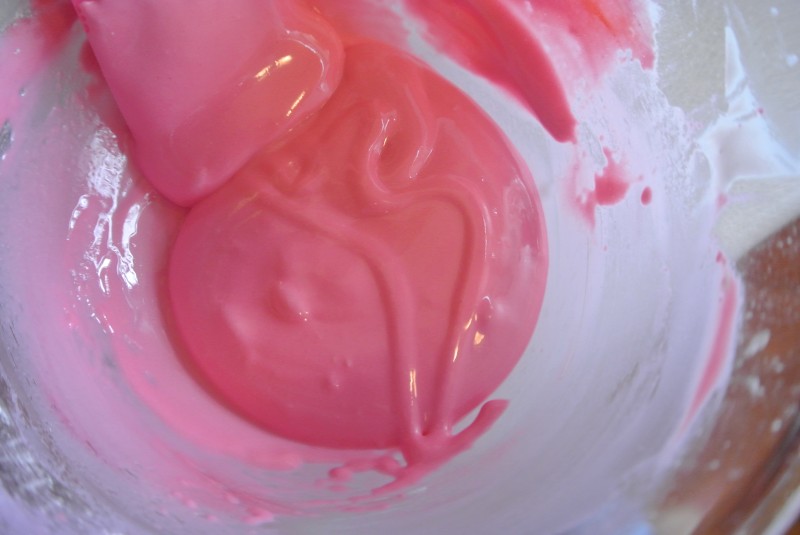
We want the trail to disappear back into the rest of the icing directly on the count of 10 seconds.
If your icing is too runny, work in a pinch of icing sugar at a time and test again.
If it’s too thick add a tiny drop of water at a time before testing again.
See these 2 videos to help you
Correct Consistency:
Adjusting Consistency:
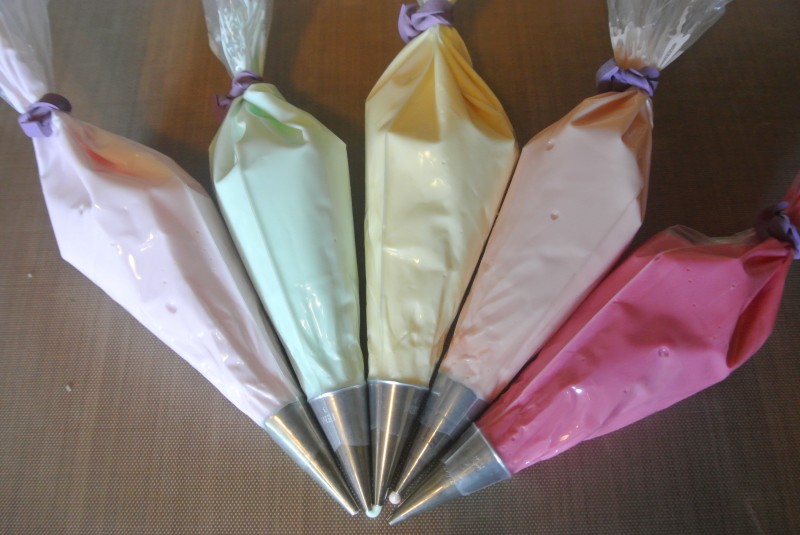
Spot on 10 seconds? It’s ready to go!
Add your icing to a piping bag fitted with a no.3 or no. 2 nozzle and it’s time for the decorating! (I find a no.3 just right for most projects)
Any left over glaze keeps well for 2 weeks in the fridge, in small containers. If you want to keep it longer then it’s best to freeze it right away.

Once you take it out of the fridge, or defrost you need to work the consistency steps again, mixing it thoroughly before using to decorate.
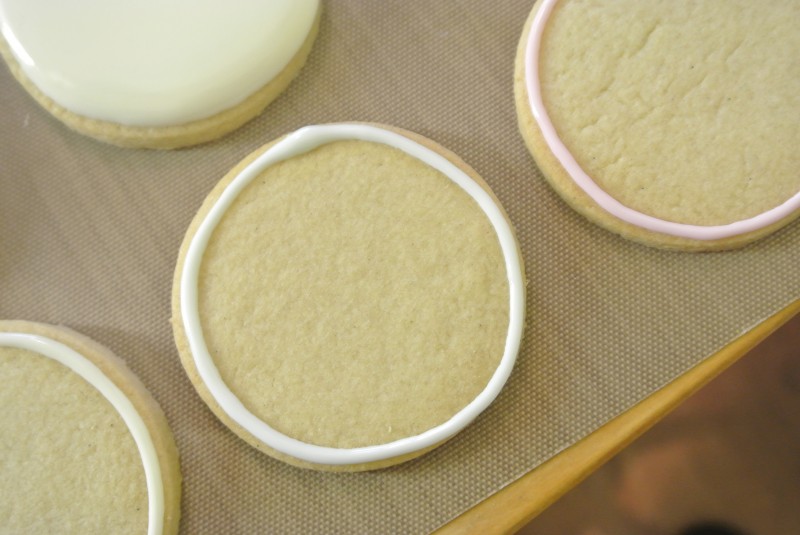
The Basics – Outline and Flood a Simple Shape:
Work on 3 or 4 biscuits at the same time.
Pipe the outline of the shape and let it set off for 1 minute.
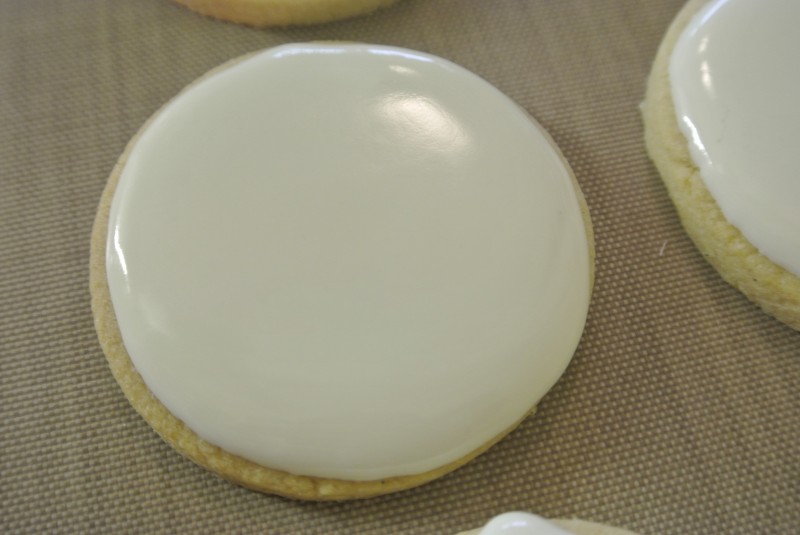
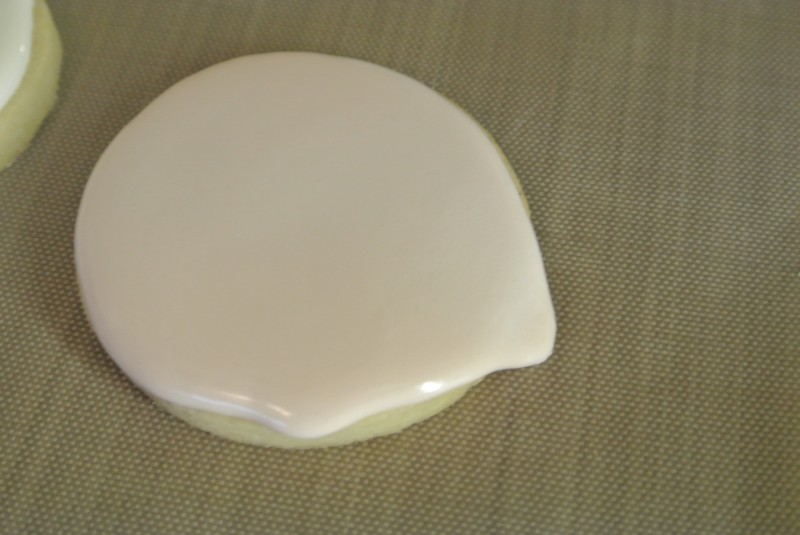
Then, using exactly the same icing – it doesn’t need letting down, work across the inside of the outline filling it with icing. This floods the biscuit and will look a little lumpy to begin with but within a minute it will have smoothed over nicely.
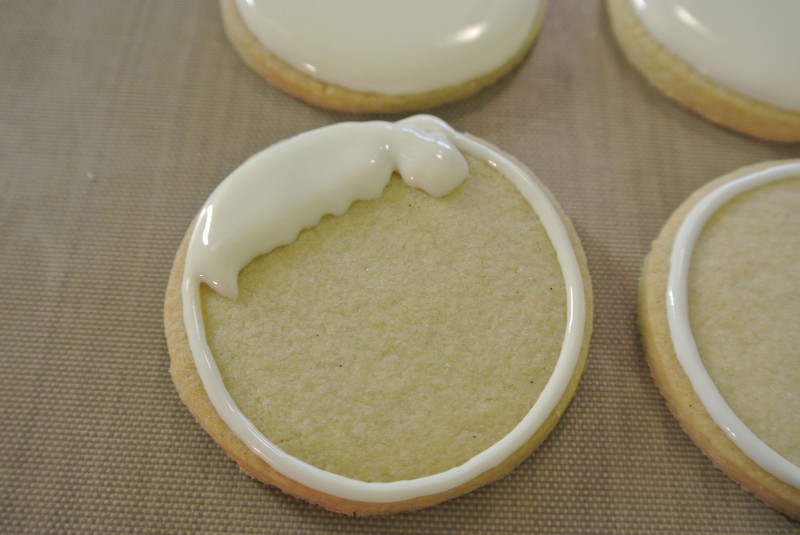
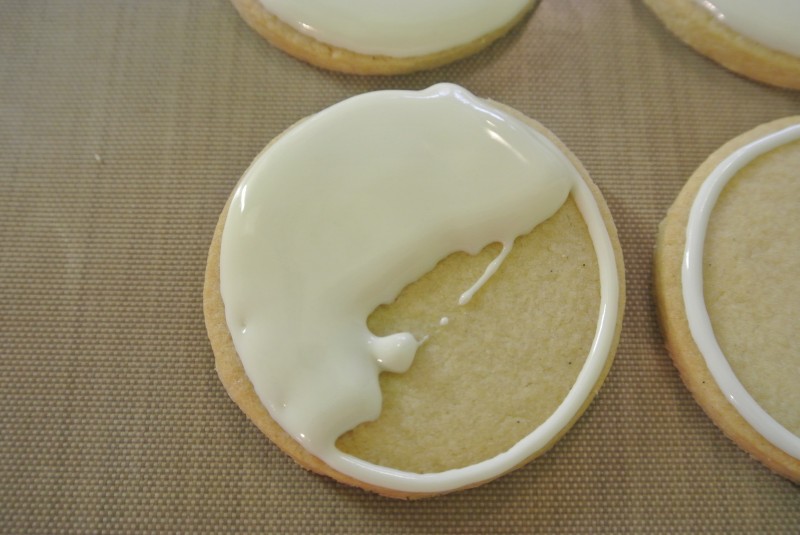
As you finish each biscuit lift it gently and tap it back down onto the worksurface. This helps to disperse any air bubbles that would rise to the surface on drying.
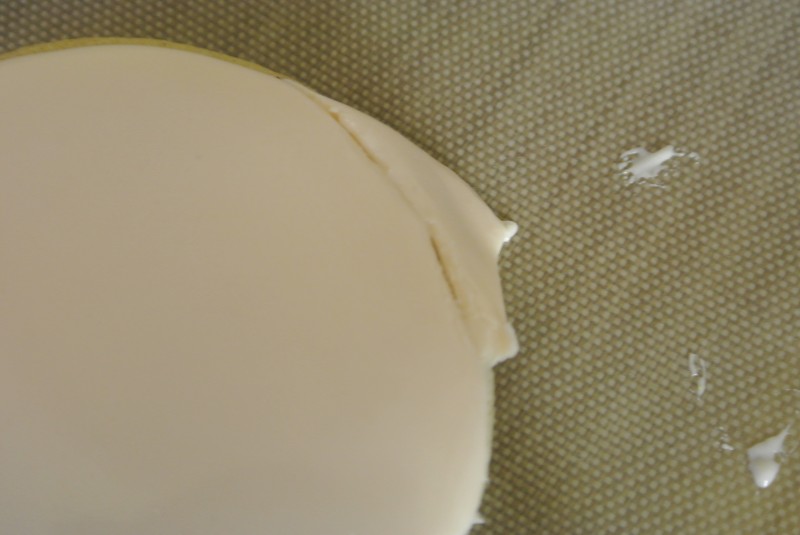
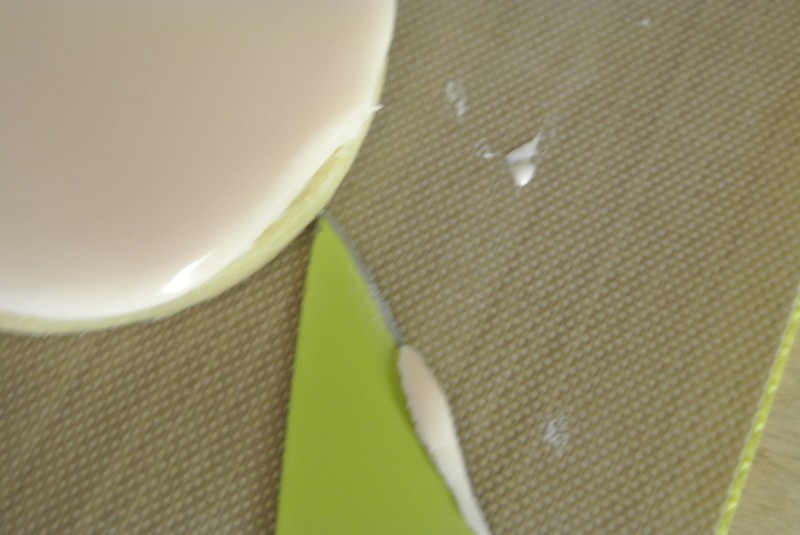
If your icing has run over the edge don’t worry! Leave it as is to dry. Once the glaze has dried fully you can take a sharp knife and trim it back into shape.
Set the flooded biscuits aside to dry fully overnight before adding any more decoration and detail.

That’s it for now, I’ll be doing a thorough how to for all sorts of other techniques with this icing shortly so do keep an eye out!
(Equipment links throughout to The Pink Whisk Shop)

Ruth Clemens, Baker Extraordinaire
Meet me down the aisles of The Pink Whisk Shop – for all sorts of cake decorating and baking delights!


Pingback: Love Heart Biscuits | Baking, Recipes and Tutorials - The Pink Whisk