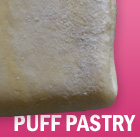
 It’s not complicated but it does take a bit of organising in advance. I do use shop-bought puff pastry and generally have some in the freezer. Making your own is quicker than the time it takes to defrost some
(and it’s not difficult either)
This version of puff pastry is referred to as rough puff pastry, the idea being that you only get 75% of the rise that you would get with traditional puff pastry – getting technical there! However, when you see the rise you get with this its far above and beyond shop bought.
Puff Pastry takes a couple of days to do and also means you have to wrestle with a full pat of butter – hmmmm, I can be organised but not that organised!
Ingredients:
250g strong plain white flour
pinch of salt
250g butter, cold
juice of 1/2 lemon
5-6 tbsps cold water to combine
To make the rough puff pastry add the flour and salt to the bowl of a food processor and give it a quick pulse to mix.
Cut the cold butter into 1/2cm slices and add to the food processor bowl.

Using the pulse function whizz until the butter is broken up but still in visible lumps. Tip the mixture out into a large mixing bowl.

Make a well in the centre and add the juice of half a lemon and then enough super cold water to make a dough. Use the blade of a table knife to mix the dough rather than your hands as you don’t want to melt the butter.


Once the dough is into a ball wrap in clingfilm and pop it into the fridge for an hour so that the butter hardens up again.
After an hour take the dough out of the fridge, lightly flour your work surface and then roll out the dough into a rectangle shape.

Fold into three like an envelope (see pictures below).


Turn the dough 90 degrees to the right so that the folds are now left and right. Roll again to a large rectangle and fold into three again. Turn and then repeat this step twice more, turning before each re-rolling and folding.

Each time the pastry gets smoother and more refined. Wrap again in clingfilm and allow it to chill for another hour in the fridge.
See? – It wasn’t difficult was it?
The pastry is now ready to be used for whatever you need it for. It can be frozen, wrapped well in clingfilm for upto six months. When defrosting, just make sure it stays dry and doesn’t sit in a pool of water.

Half a block is sufficient for a puff pastry top for a pie so it may be a good idea to cut it into half before freezing.
Traditionally you shouldn’t re-roll puff pastry trimmings. It disturbs the buttery layers within the pastry which you’ve worked so hard to create. However, you can. In these times throwing away pastry trimmings is wasteful and I just can’t do it. Gather together the trimmings and gently squeeze them back together as a ball. Chill this wonky ball of pastry for half an hour or so until firm again.
This ‘wonky’ trimmings puff pastry is ideal for Palmiers – see recipe here. You can’t guarantee a huge rise or that the rise is in the right direction but it still tastes delicious all the same (and its better than heading for the bin!)
So now you’ve cracked Puff Pastry, here are some delicious recipes to use it with:
Betty’s Vanilla Custard Slices

Ruth Clemens, Baker Extraordinaire
Finalist on BBC2 The Great British Bake Off 2010


Pingback: Pie Time! |
Pingback: Eccles Cakes | Baking, Recipes and Tutorials - The Pink Whisk
Pingback: Baked Camembert | Baking, Recipes and Tutorials - The Pink Whisk