 " width="477" height="261" border="0">
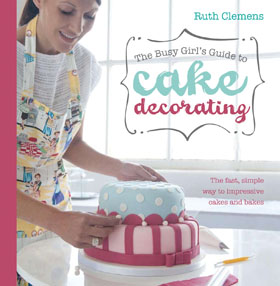
I’ve already shown you how to marzipan and cover a fruit cake with sugarpaste when we were making Christmas cakes last year (post here) but it’s useful to be able to cover sponge cakes with sugarpaste too. The preparation is a little different so here’s how to….
You will need:
Cake
Buttercream or Frosting – Chocolate, Vanilla or Cream Cheese
Serrated bread knife
Palette knife

To begin with you will need to level and fill your cake. It’s best if the cakes are still in the tins you baked them in.
Take a serrated bread knife and trim off the domed tops, keeping the knife level across the tin. (You can feed these trimmings to the children, yourself or crumble them up to make cake pops – they won’t go to waste!)
If the cake sits below the edge of the tin try dropping in a couple of cake boards or impromptu kitchen paraphenalia (a small plate, jar lids etc) below the cake so that it sits at the right height to level.

Take the cake that will be the base and add a layer of frosting or buttercream. I place it onto a flexible chopping board to make it easier to work on and maneovre but you could just as easily use a plate.

Place the second cake on top with the flat base as the top.

Now chill the cake in the fridge for half an hour. This will make coating the sides and top much easier as the cake is firmer and less likely to shred into crumbs.
Once chilled begin by adding a smooth layer of frosting to the top. Smoothing it roughly to begin with a palette knife.

Now turn your attention to the sides spreading the frosting with the palette knife, continue working your way around. Use the edge of the palette knife in an almost scraping action to smooth out the frosting. Add in little dollops of frosting to any areas that are still indented and work until you have a smooth straight edge.


You want to be left with a thin layer of frosting coating the sides, in places you will be scraping off frosting as you smooth. Discard this into a small bowl.
Once the sides are as smooth and even as you can get them return your attention to the top and smooth in around the outside edge until the top is even again.

Place the cake back in the fridge for an hour or so until the frosting is firm.

Now to cover with sugarpaste. Transfer the chilled cake to a cake board. Lightly dust your surface with a little icing sugar. Not too much as it dries out sugarpaste very quickly and will make it crack. You could also use a special non-stick mat which cuts down on icing sugar usage!
Knead your chosen sugarpaste until it has softened up and is pliable ready to use.
Roll it out using a smooth rolling pin – you are aiming for a thickness of 5-7mm. If you’re decorating a lot of cakes it’s worth investing in a special sugarpaste non-stick rolling pin. They’re much bigger and smoother (and non-stick) than regular kitchen rolling pins.

Measure the size you will need your sugarpaste to be by taking a piece of string and measuring up one side of the cake, over the top and down the opposite side.
Try not to roll out your sugarpaste much bigger than you need it otherwise the excess will cause a lot of cracking and ripping when it comes to covering.
Once the sugarpaste is the correct size take an icing polisher/smoother and work it over the surface gently evening out any marks/lumps/bumps!

Place the rolling pin in the middle of the sugarpaste and flip it over as you would with pastry.

Now offer up the sugarpaste to the cake, start at the base of one side and unflip the sugarpaste gently over the cake.


Using the flat of the your hand gently smooth the sugarpaste on the top of the cake.
Cup your hands and begin to smooth the sides beginning with just the very top edge of the cake.

Gradually move your hands in this cupping motion downwards. Lifting out any creases by lifting the edge of the sugarpaste and smoothing with your cupped hand as you go – the action is similar to swooshing the base of skirt – but less swooshy and more carefully!
Work slowly and carefully until you reach the base of the cake.
Sugarpaste is often likely to start to crack around the top edges as this is where the stress point is. Cracks can be healed back together by rubbing them gently with your fingertips in a circular motion.
Now start to smooth the top and the sides of the sugarpaste with an icing smoother – this is how the super smooth glossy appearance is created. As you smooth towards the base a natural line is created for you to trim away the excess.

Take a sharp knife and cut away the excess at the base carefully. Remember if this goes a bit wonky you could always cover it with ribbon.

That’s it – How to Cover a Cake with Sugarpaste – the decoration bit is up to you!

Ruth Clemens, Baker Extraordinaire


48 Responses to How to Cover a Cake with Sugarpaste