You will need:
1 x 8” Christmas cake, marzipanned and covered in white sugarpaste
A black edible ink pen (available from Lakeland, Amazon here or your local Hobbycraft)
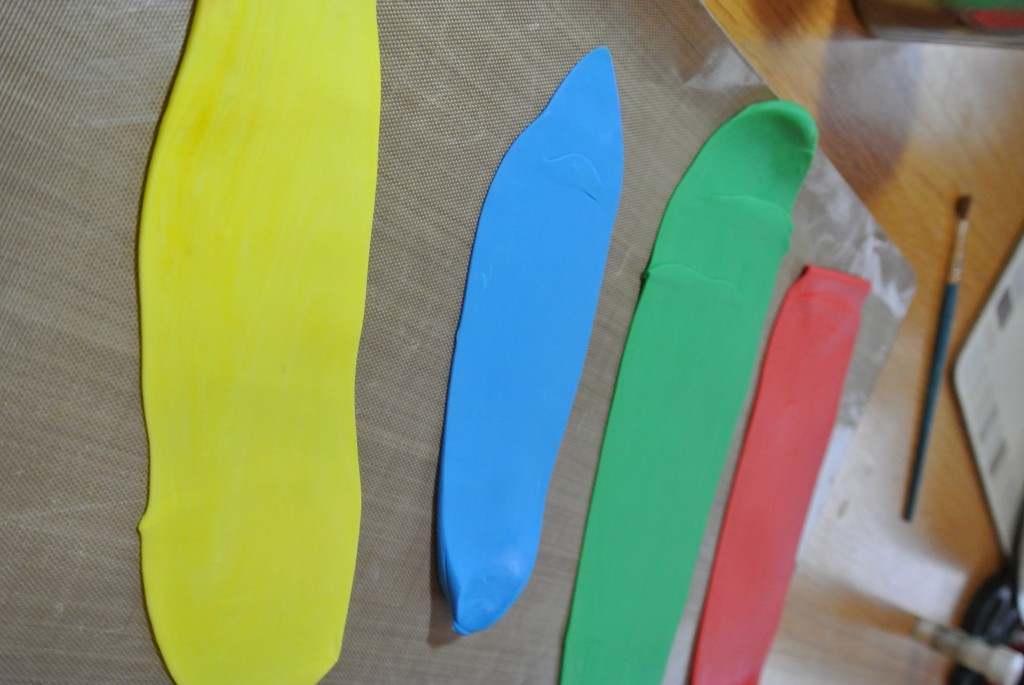
Sugarpaste in festive colours (red, blue, yellow and green)
A little royal icing
A piping tip or a small round cutter.
Festive lights template – click here Festive Lights The Pink Whisk Template
So you’ve marzipanned and covered your Christmas cake. If you haven’t then you can find my instructions right here.
Now you need a little patience! You need to put the cake into a cake box (ideally a cardboard box not an airtight one please) and set it to one side to allow the icing to start to dry out, 2-3 days is just right.
Print out the festive lights template I’ve drawn up here Festive Lights The Pink Whisk Template– it’s to suit a round 8” cake but feel free to come up with your own template if you’re working on a different size or shaped cake.
Trace the template onto a piece of baking paper.
Position the template onto the top of the cake. Trace the line for the wires and the positions of the lights across the top of the cake, pressing lightly with the wrong end of a wooden skewer, the wrong end of a thin paintbrush or something similar you may have in the kitchen. This tracing just very lightly transfers the guides onto the cake for you to work with. They may be difficult to see from head on but if you look across the top of the cake from the side you should be able to see them better.
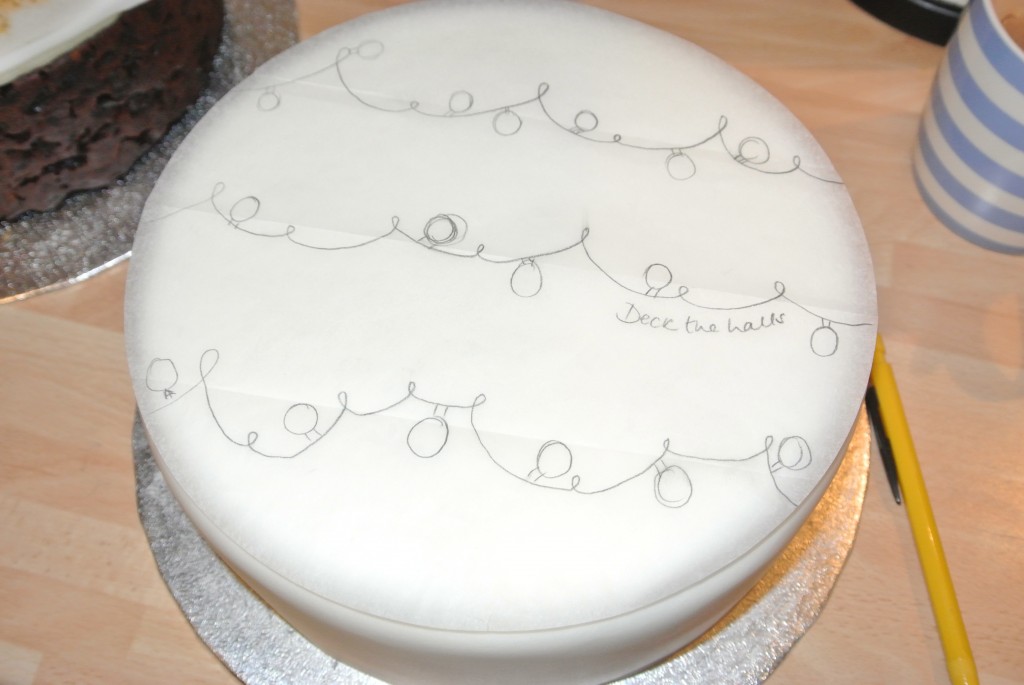
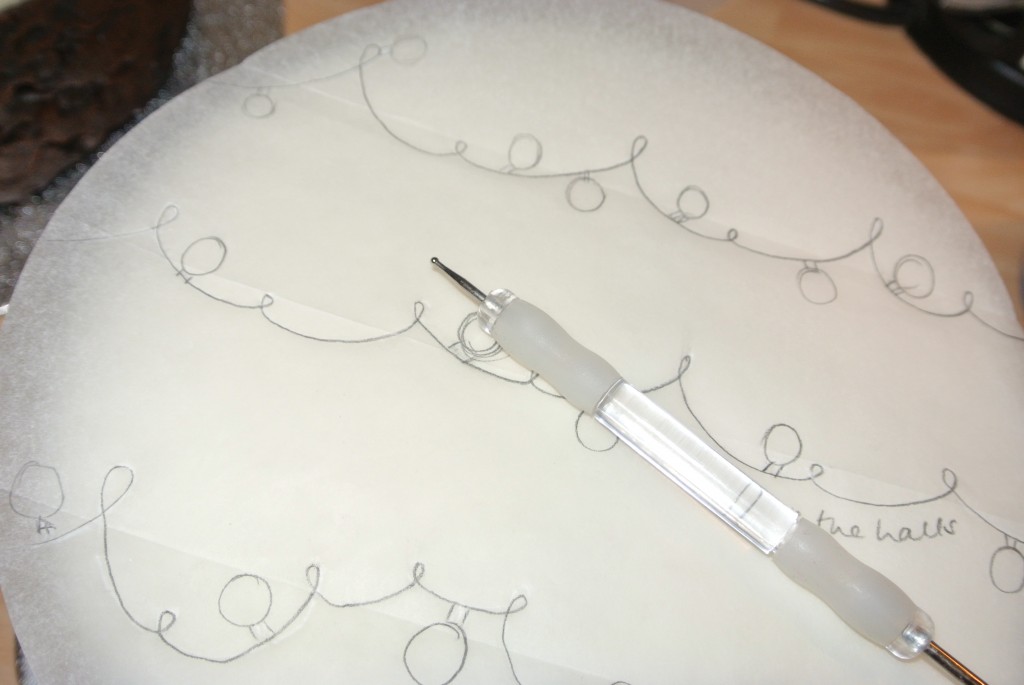
Tip: Try to make sure that you don’t rest your hand onto the cake whilst you are tracing – it’s easy to do! Just pay attention to keeping your hand above the cake and only the tool that’s tracing coming into contact with the cake.
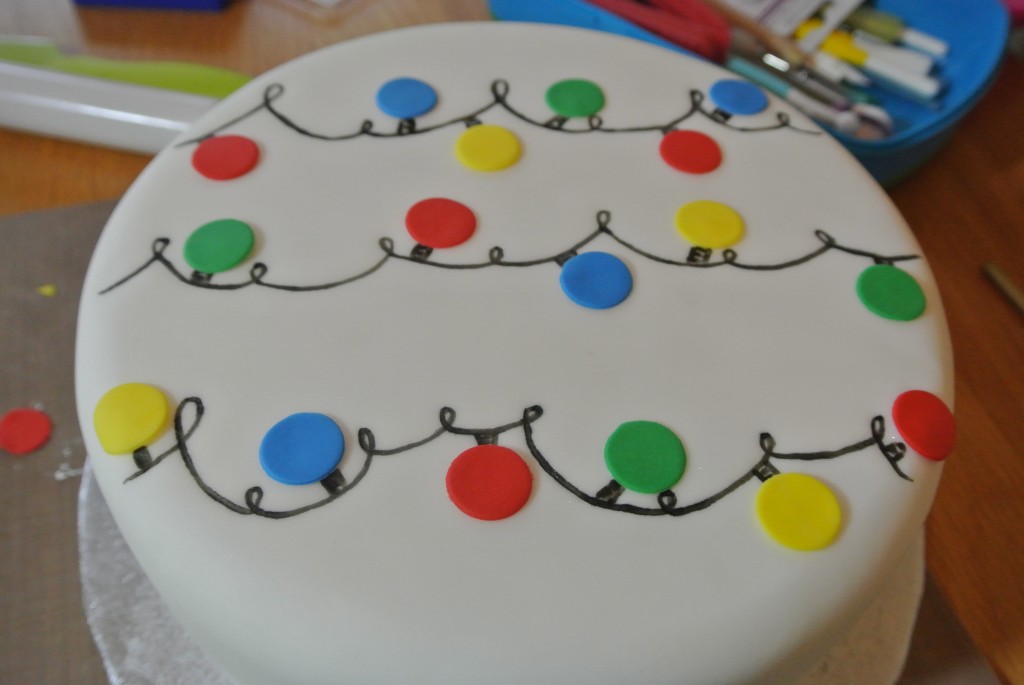
Now take the black edible ink pen and draw in each line. Go over the line a second time to slightly thicken and darken the line.
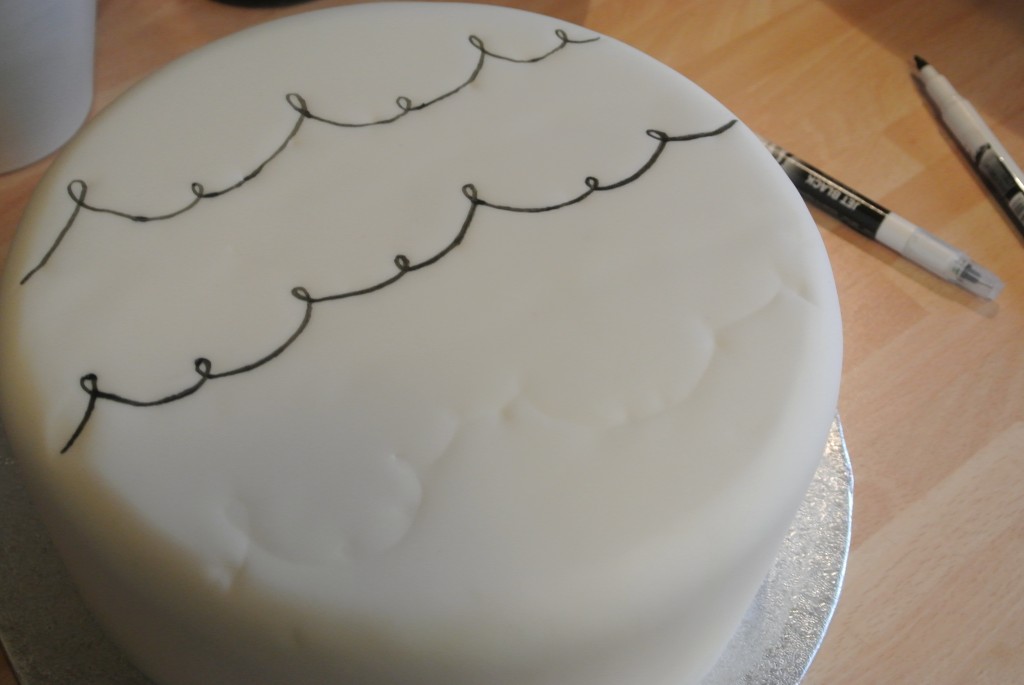
Resting your hand on an upturned flowerpot of something similar makes the drawing of the lines much easier.
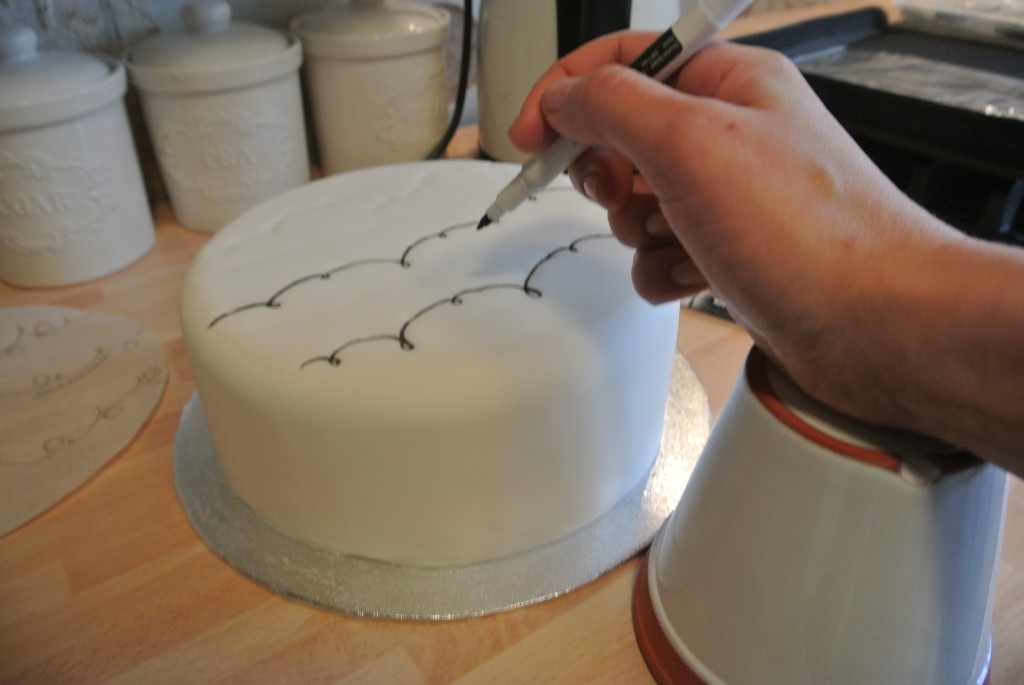
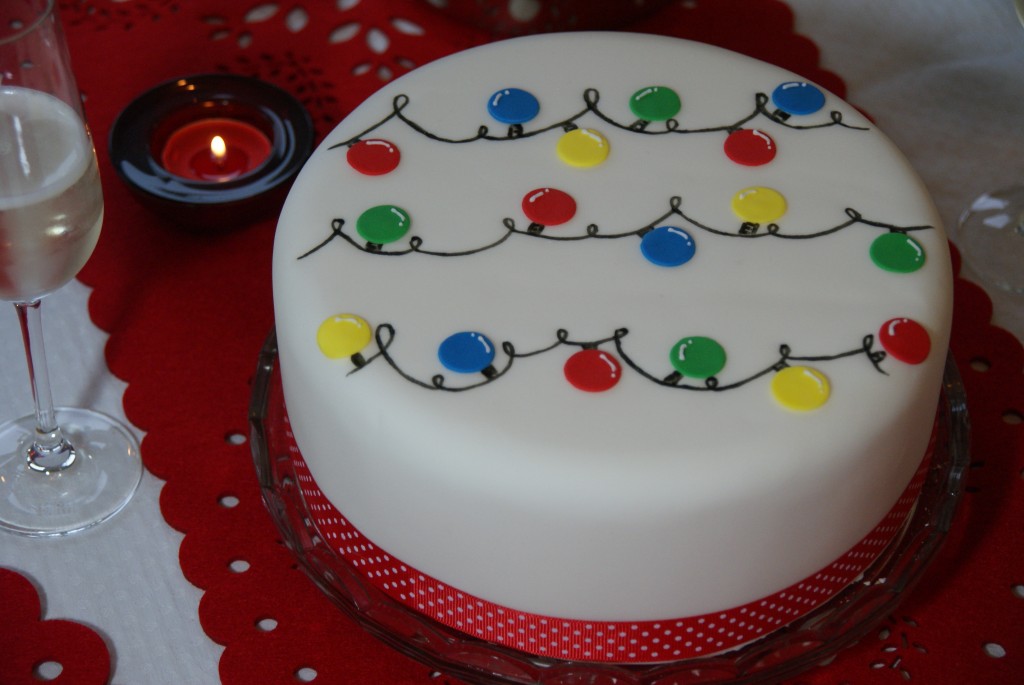
Mark on the bases of each bulb.
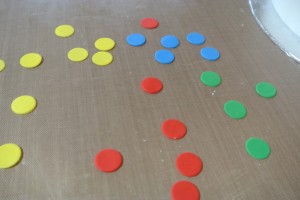
Now to the lights. Roll out the coloured paste nice and thinly, leave it to start to harden a little – about 3-4 minutes – this makes it easier to cut out neatly.
Very lightly dust the wide open part of a piping nozzle with a little icing sugar and use it to cut out a selection of coloured bulbs.
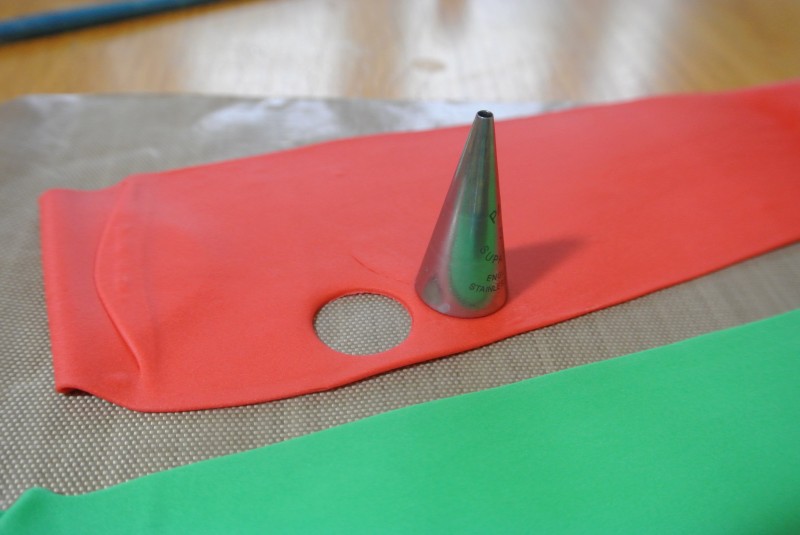
Make sure you dust it each time between cutting out to stop them from sticking. If they need help gently ease them out. If the circles are distorting as they are released then allow the paste to dry out a little more before cutting them out.
When you have enough coloured bulbs secure them to the cake in position using a light brush of water.
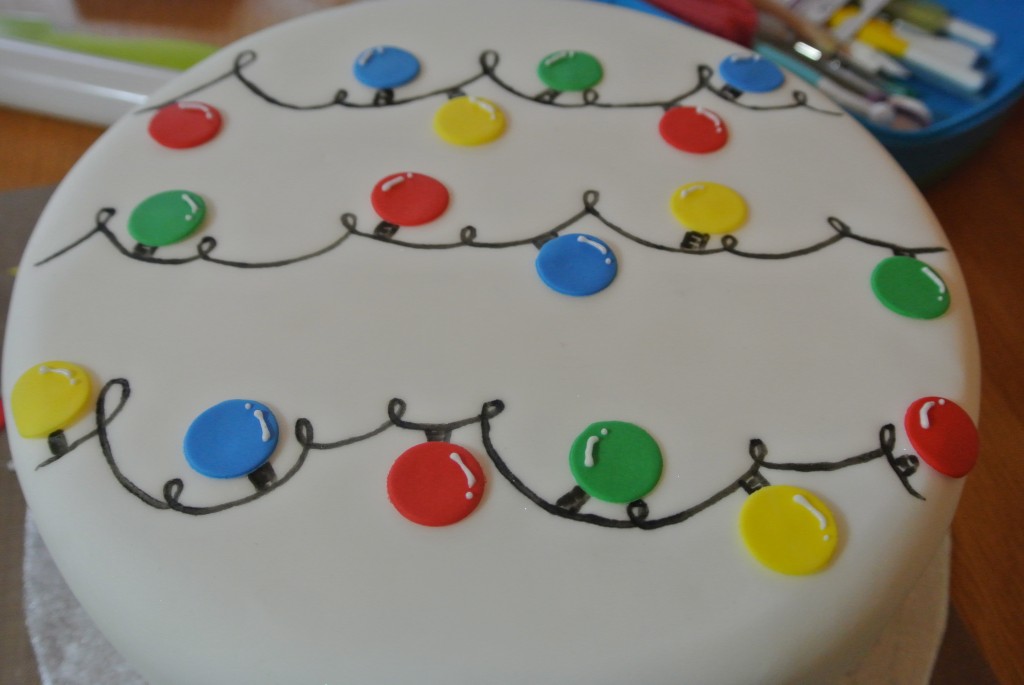
To add the reflective detail on the bulbs pipe a little royal icing onto each. Royal icing is best made up using a packet of royal icing sugar but just adding a tiny bit of water at a time to prevent it from being too runny.
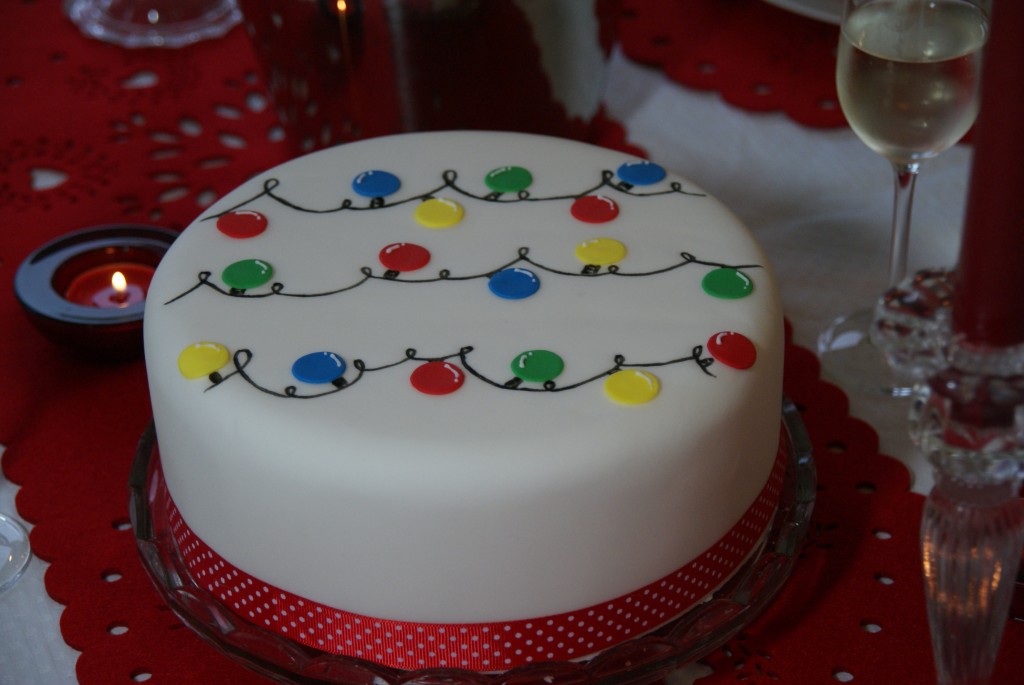
Last step is to add a festive ribbon around the base of the cake and secure it with a pearl headed pin. Ta Dah!

Ruth Clemens, Baker Extraordinaire


Pingback: Day 1 – Ideas for Decorating your Christmas Cake | Baking, Recipes and Tutorials - The Pink Whisk